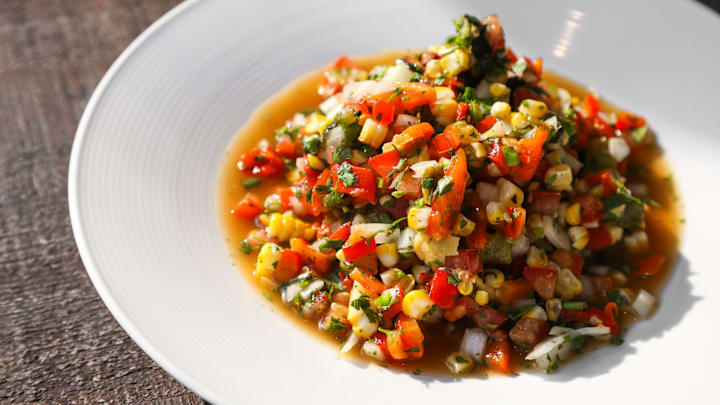
Every party needs a show-stopper, but finding an unforgettable recipe can be challenging. This grilled corn and roasted pepper salsa from the Institute of Culinary Education (ICE) will make your job easier.
The recipe calls for shucking (or husking), which is the process of removing the tough green leaves from an ear of corn. Leif Evans, chef-instructor of culinary arts at ICE’s New York City campus and creator of the recipe, has a great tip on how to shuck corn quickly. “The stock end of the ear of corn where it was attached to the stock—usually [I try] grabbing that and snapping that off first because all the husk is connected to that,” he tells Mental Floss. “Then the rest of the husk actually peels off the cob very easily.”
This grilled corn and roasted pepper salsa hardly takes any time to make. Start by preheating your grill to high. “If you don’t have a grill, putting [the ingredients] under the broiler of your oven would be totally fine, too,” Chef Leif says. “You can actually do it right on the burner on a gas stove as well.”
To prepare the corn, you’ll want to shuck it and remove its silk, which is the layer of strands between the husk and ear. At this point, you can season the corn with salt, pepper, and olive oil and place the ears on the grill, in the oven, or on the gas stove burner to char them. Make sure you rotate the corn to char all sides. Once done, set them aside and allow them to cool before removing the kernels from the cob.
Now, you’re ready to prepare the peppers. Coat them with olive oil and place them on or in a heat source (a grill, oven, or gas stove burner) to char them. You’ll need to rotate the peppers to cook every side, similar to the corn. Next, place the peppers in a bowl and cover them. Let them sit for about 10 minutes. You can put them on a cutting board and remove the charred skin once they’re properly steamed. Then, cut the peppers open, remove their seeds, and dice the flesh.
Combine the kernels, tomatoes, peppers, onion, and cilantro in a bowl and season with a bit of salt and pepper. Last but not least, add lime juice, adjusting the taste to your liking. Enjoy the salsa with your favorite tortilla chips or tacos.
Whether a beginner or a veteran cook, you can take classes from renowned chefs at ICE’s New York City and Los Angeles locations. Pastry and baking arts, plant-based culinary arts, and hospital and hotel management are just some of the programs the school offers. To learn more about The Institute of Culinary Education, visit its website.
Grilled Corn and Roasted Pepper Salsa
Serves: 8-10 people
Ingredients
2 ears of corn
3 plum tomatoes, seeded and diced
1-2 jalapeños (depending on your liking)
2 red bell peppers
2 poblano peppers
1 medium yellow onion, diced
1 bunch cilantro, chopped
Juice of 4 limes
Olive oil
Salt and pepper
- Pre-heat the grill to high.
- Shuck the corn and clean all of the silk off the cobs. Thinly coat the corn with olive oil and season with salt and pepper. Place the cobs on the grill and char on all sides. Allow them to cool, then cut the kernels off the cobs.
- Coat all peppers in a small amount of olive oil and place on the grill. Rotate the peppers to char all the way around evenly.
- Place the peppers in a bowl and cover it with plastic wrap. Let them steam for about 10 minutes.
- Remove the plastic wrap and put the peppers on a cutting board. Remove the charred skin from the vegetables, then split them open, remove the seeds, and dice the ingredients.
- Toss the corn, tomatoes, peppers, onion, and cilantro in a bowl and season everything with salt and pepper.
- Add lime juice to your liking and serve with tortilla chips or on tacos.
Note: The salsa is better if made the day before so it can marinate in the refrigerator overnight.
Read More Recipes:
