The First World War was an unprecedented catastrophe that shaped our modern world. Erik Sass is covering the events of the war exactly 100 years after they happened. This is the 209th installment in the series.
November 10-11, 1915: Failure at Fourth Isonzo
The Third Battle of the Isonzo had scarcely ended in defeat on November 4, 1915 when Italian chief of the general staff Luigi Cadorna ordered another frontal assault on Habsburg defenses in the Fourth Battle of the Isonzo from November 10-December 2 – using the same tactics in the same place, with the same objective (the town of Gorizia), predictably producing the same results.
After the Italians came close to a breakthrough at the end of the Third Battle of the Isonzo, Cadorna received two dozen battalions of recently mobilized troops – but this was a mixed blessing, as these fresh troops were also green and inexperienced. Furthermore artillery shells were running low, meaning the all-important opening bombardment would have to be shortened. Meanwhile the Austro-Hungarian defenders of the Habsburg Fifth Army used the weeklong pause to frantically dig new trenches, sometimes using dynamite to blast holes in the solid rock, and bring up ammunition and supplies.

Following a brief bombardment on November 10, 1915, the Italian Second and Third Armies launched infantry assaults against the same Habsburg defensive positions on the slopes of Mounts San Michele, Mrzli, Podgora and Sabotino. Once again the attackers ran into a hail of machine gun fire as they tried to pierce the wide, deep barbed wire entanglements in front of the Habsburg trenches, almost always without success.
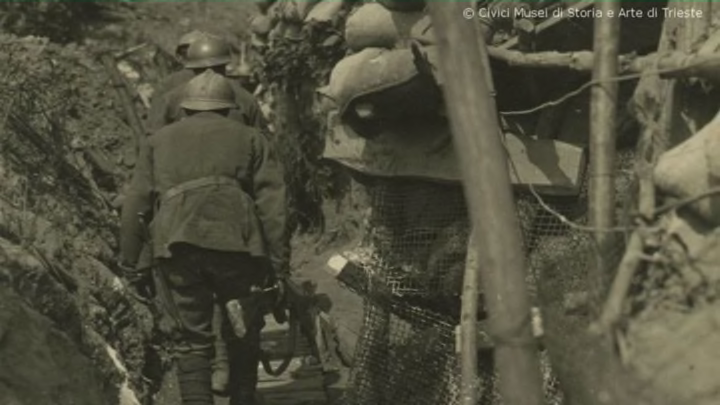
Even worse (for both sides) winter was arriving in the mountains, with the first snow falling on the foothills of the Julian Alps on November 16. The snow quickly blocked narrow, winding mountain roads, disrupting supply lines and leaving troops in the frontline trenches without food for days at a time. Thousands of troops on both sides suffered frostbitten feet and hands, making them useless for combat. In places where the snow melted or the autumn rains lingered it turned the hillsides into cascades of mud; after several days in this environment one commander described his men as “walking shapes of mud.”
Despite all this, on November 26 the Italians once again almost succeeded in breaking through the Habsburg lines near the crest of Mount Mrzli – but once again Austrian reinforcements arrived just in time to plug the gap and force the Italians back. This time the scare was bad enough that Austro-Hungarian chief of the general staff Conrad von Hotzendorf swallowed his pride and asked Austria-Hungary’s contemptuous ally, Germany, for help on the Italian front.
There was one bright spot for Italy: on November 23 the Italian First Army, facing the Habsburg Tirol force, captured the town of Rovereto in the Trentino during a diversionary attack. On the other hand on November 18 the Italians suffered a self-inflicted propaganda defeat with Cadorna’s decision to shell Gorizia, a beautiful city known as the “Nice of the Alps” inhabited by ethnic Italians, whom they were supposedly trying to “liberate.”
By the time fighting ended in early December, the Fourth Battle of the Isonzo had cost the Italians around 50,000 casualties, including 7,500 dead, compared to around 32,000 Habsburg casualties, with 4,000 dead.
British Advance on Baghdad
A thousand miles to the east, the British Indian Expeditionary Force under Sir Charles Townshend was ready to resume its march on Baghdad, the capital of Ottoman Mesopotamia.
At this point Townshend’s army seemed invincible: the mixed Anglo-Indian force had defeated the Turks at Shaiba and then captured Qurna and Amara almost effortlessly (the conquest of Amara was carried out by bluff, as Townshend arrived with a handful of troops and convinced the much larger Turkish garrison his reinforcements were just a few hours away). Another victory over the Turks at Nasiriya on the Euphrates in July secured the British left flank, clearing the way for Townshend to advance to Kut-al-Amara, which fell on September 28, 1915.
From Kut-al-Amara Baghdad lay tantalizingly close – just 75 miles north on the Tigris River – and the string of easy victories seemed to confirm the belief of Townshend’s commanding general Sir John Nixon that the Turkish army in Mesopotamia was demoralized and nearing collapse. Thus on November 11 the IEF started on its fateful march towards Baghdad, its officers confidently expecting to be touring the bazaars of the legendary city within a few weeks. By November 20 they had occupied Lajj, about 25 miles southeast of Baghdad.
However the British were disastrously wrong about the state of Turkish defenses in Mesopotamia. Far from collapsing, the defenders had received substantial reinforcements in the form of the Ottoman Fifth Army now based in Baghdad, soon to be under the veteran elderly German General Colmar Freiherr von der Goltz, for a decade the head of the German military mission to Turkey, who was venerated by the Turks as “Goltz Pasha.”

The first sign of stiffening resistance came at Ctesiphon, the ruined ancient capital of the Parthian Empire, just 15 miles southeast of Baghdad. At the Battle of Ctesiphon, from November 22-24 four heavily entrenched Turkish and Arab divisions under the Fifth Army’s soon to be ex-commander, Colonel Nureddin, fought the Anglo-Indian force to a draw, inflicting heavy casualties on Townshend’s small force (above, Townshend at Ctesiphon). Townshend decided to lead his outnumbered troops back to Kut-al-Amara to receive new supplies and reinforcements – a fateful mistake.
See the previous installment or all entries.
